Reference

Run visualization

Schema reference for activating the routing-based visualizations in Console.

In Console, when you make a run with a Nextmv Routing app based on nextroute (either the Marketplace app or a custom app), the run result will have a routing-based visualization for the input and output.

Screenshot showing the result of a routing run with multi-colored routes on a map.

The routing visualization is activated based on the input and output schema. For custom apps, if you would like to have the same visualization as nextroute apps, the following minimum schema must be adhered to.

Input

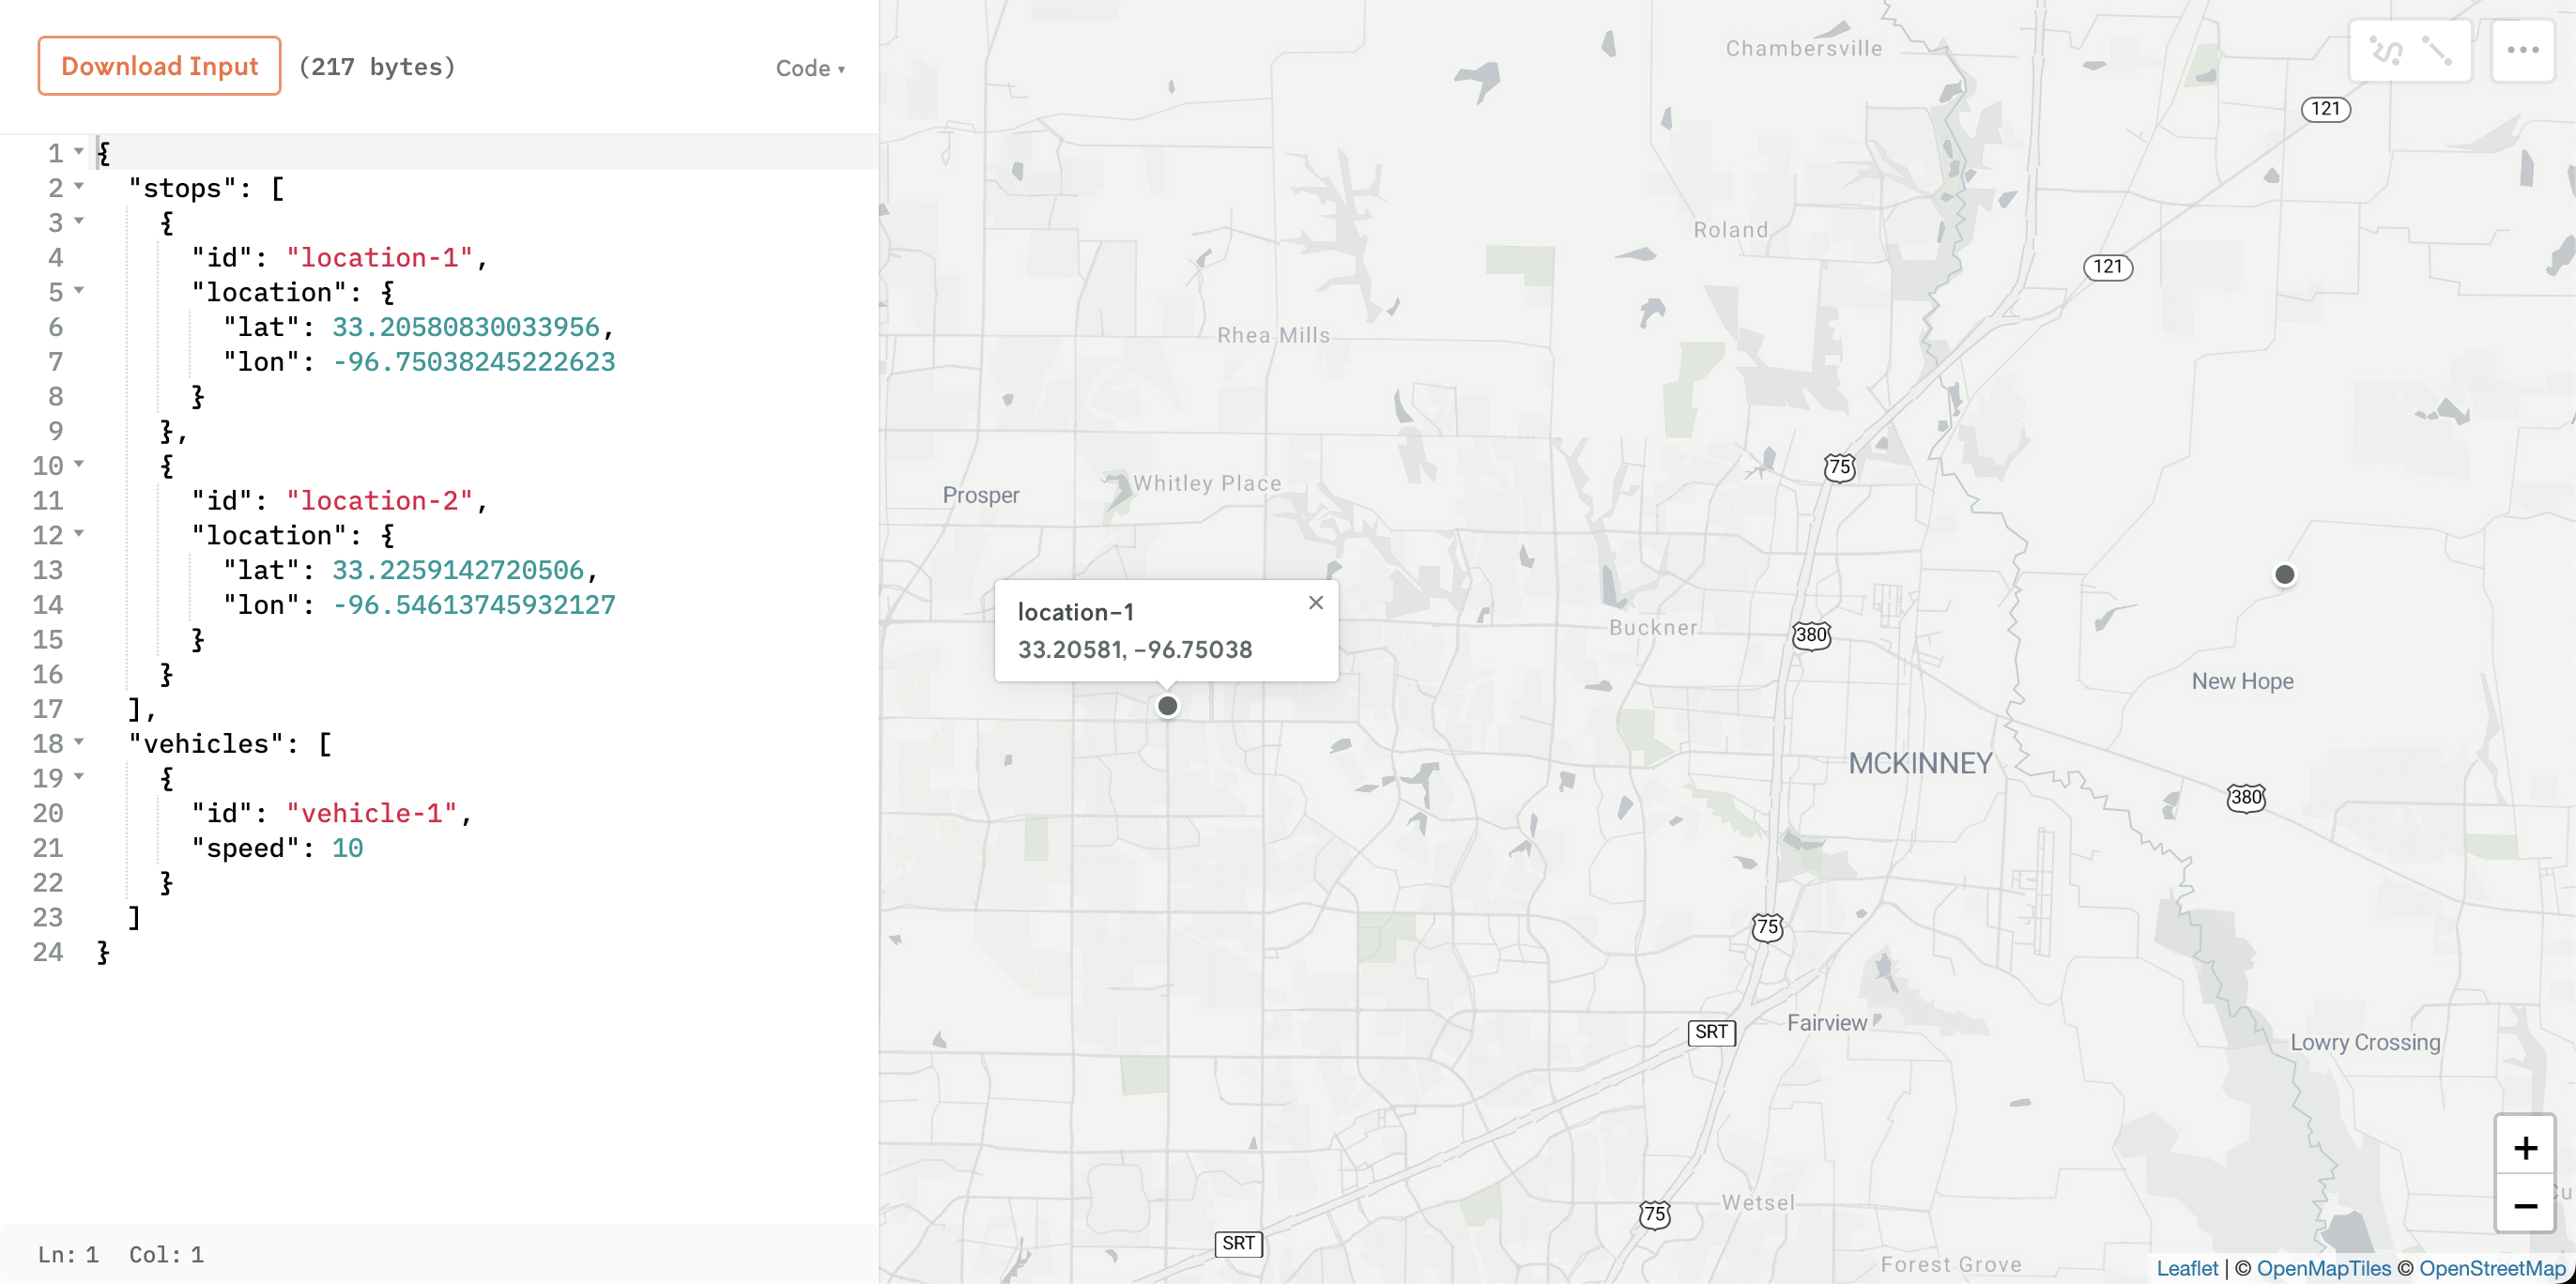
The minimum required schema to enable the routing visualization for input is to specify the lat and lon of a stop’s location in a location block along with a unique id field, and then place these stop objects in a top-level stops array:

{
  "stops": [
    {
      "id": "location-1",
      "location": {
        "lat": 33.20580830033956,
        "lon": -96.75038245222623
      }
    },
    {
      "id": "location-2",
      "location": {
        "lat": 33.2259142720506,
        "lon": -96.54613745932127
      }
    }
  ],
  "vehicles": [
    {
      "id": "vehicle-1",
      "speed": 10
    }
  ]
}
Copy

This will enable the locations on the map:

Screenshot showing the two locations plotted on a map.

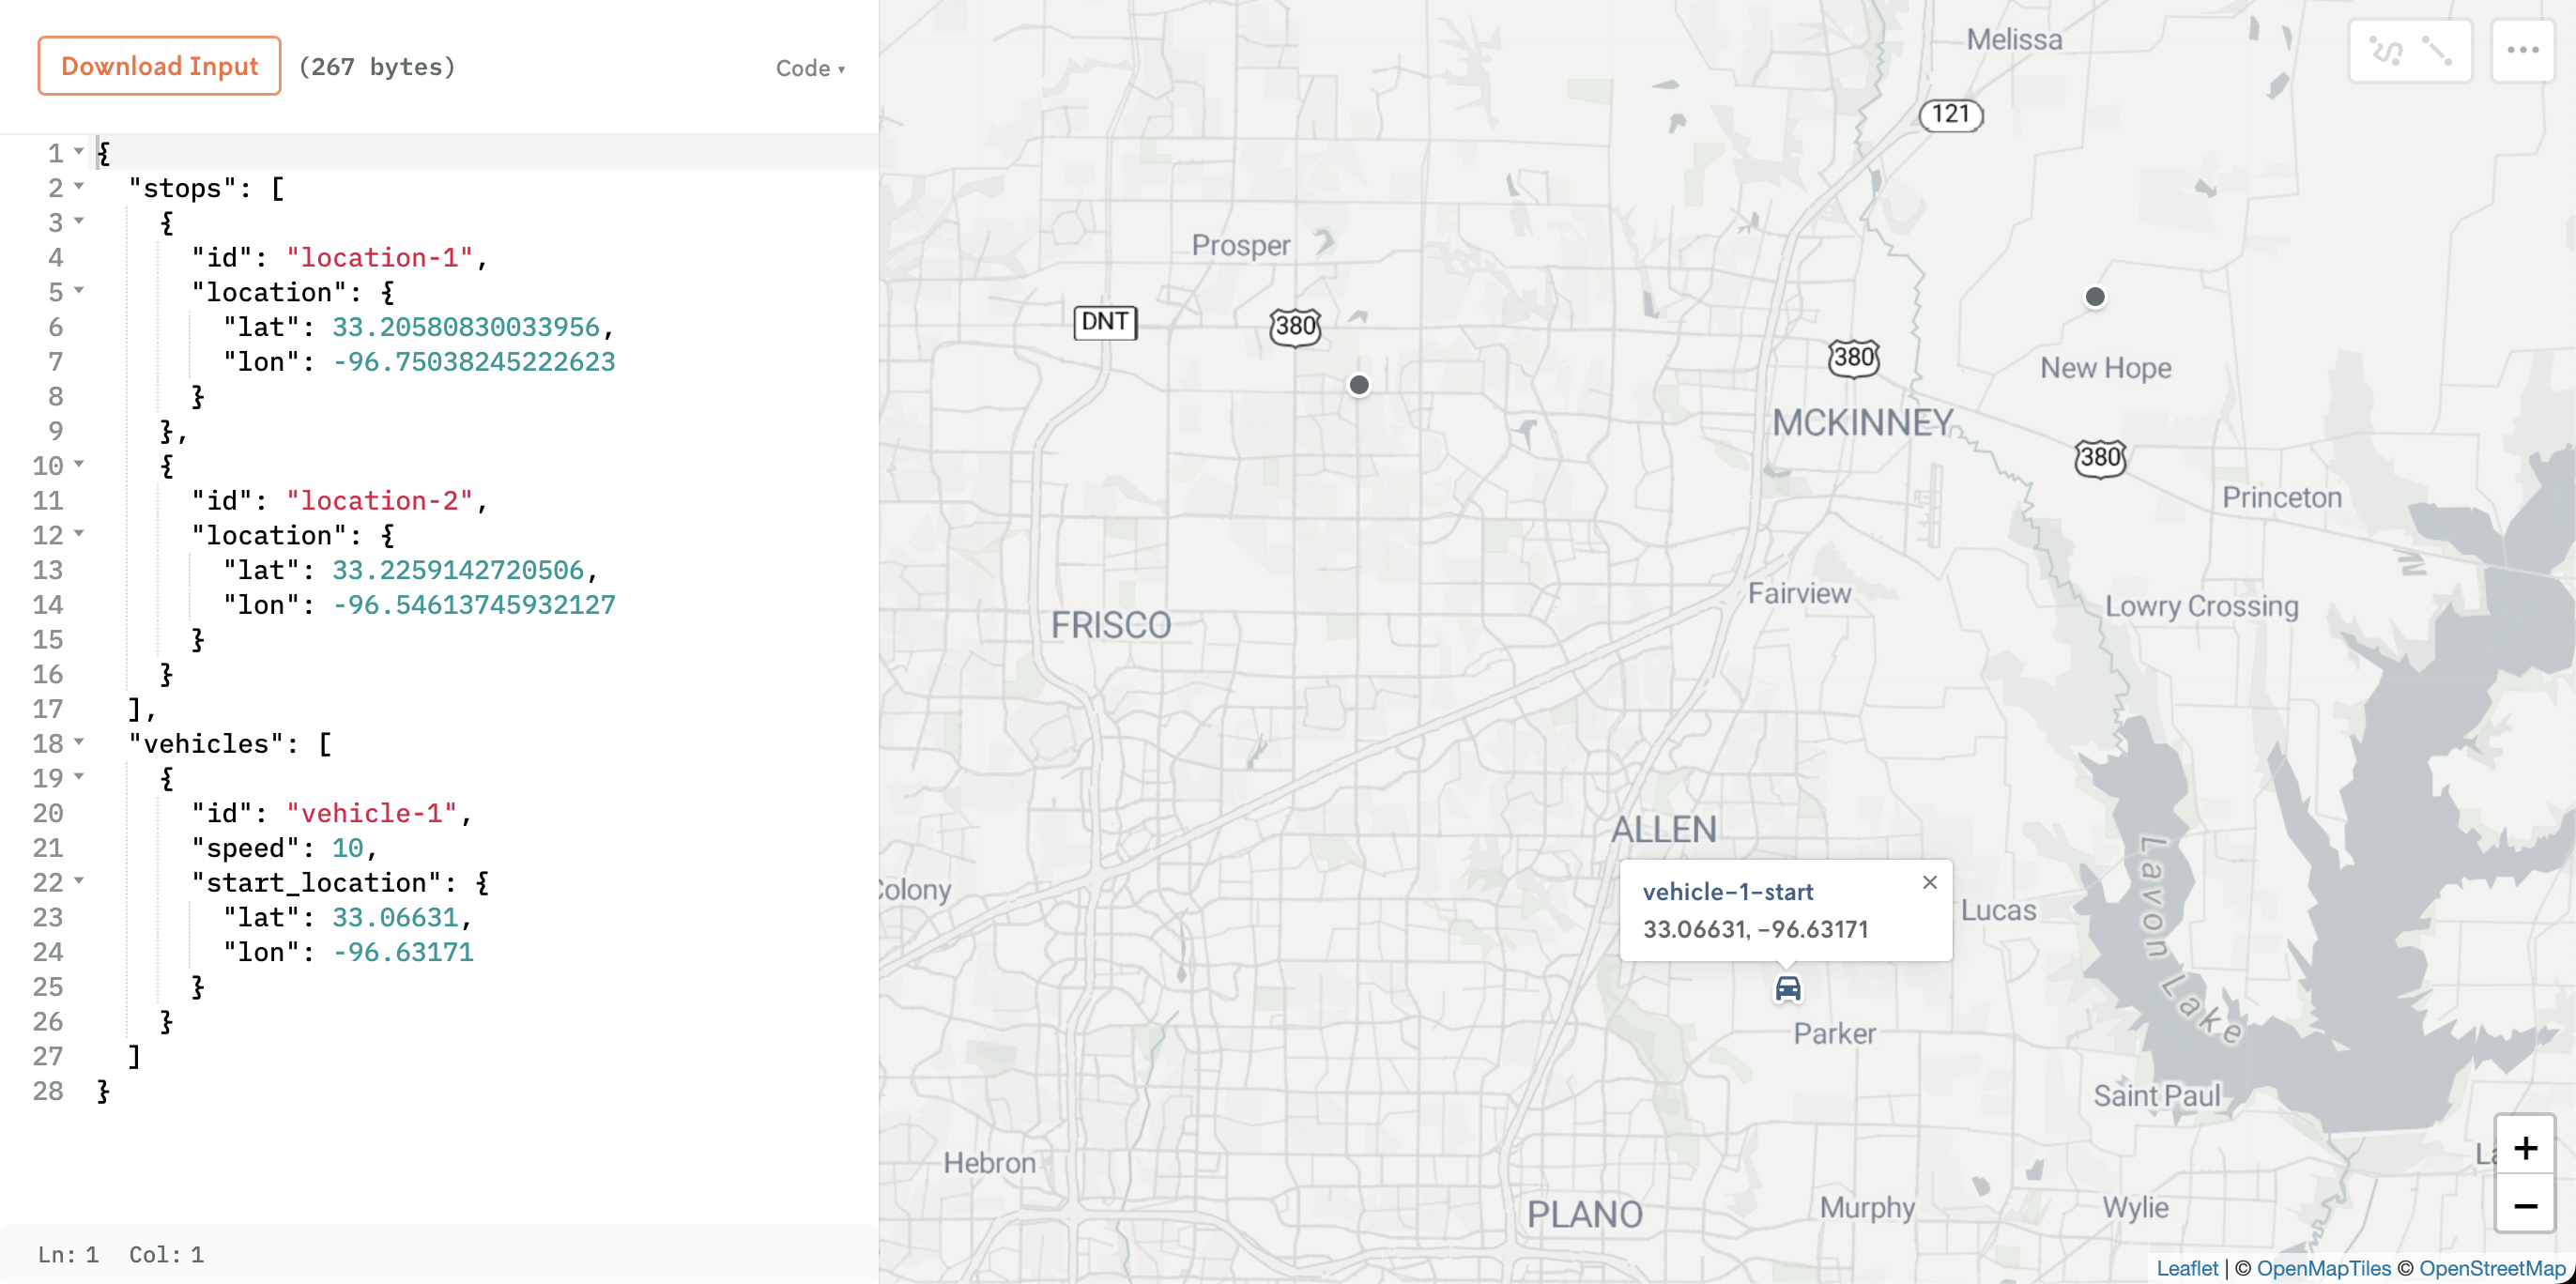
Vehicles can be visualized on the map as well if they are given either a start or end location (or both).

{
  "stops": [
    {
      "id": "location-1",
      "location": {
        "lat": 33.20580830033956,
        "lon": -96.75038245222623
      }
    },
    {
      "id": "location-2",
      "location": {
        "lat": 33.2259142720506,
        "lon": -96.54613745932127
      }
    }
  ],
  "vehicles": [
    {
      "id": "vehicle-1",
      "speed": 10,
      "start_location": {
        "lat": 33.06631,
        "lon": -96.63171
      }
    }
  ]
}
Copy

Screenshot showing the two locations and a vehicle start location plotted on a map. The vehicle location is shown with an icon of a car.

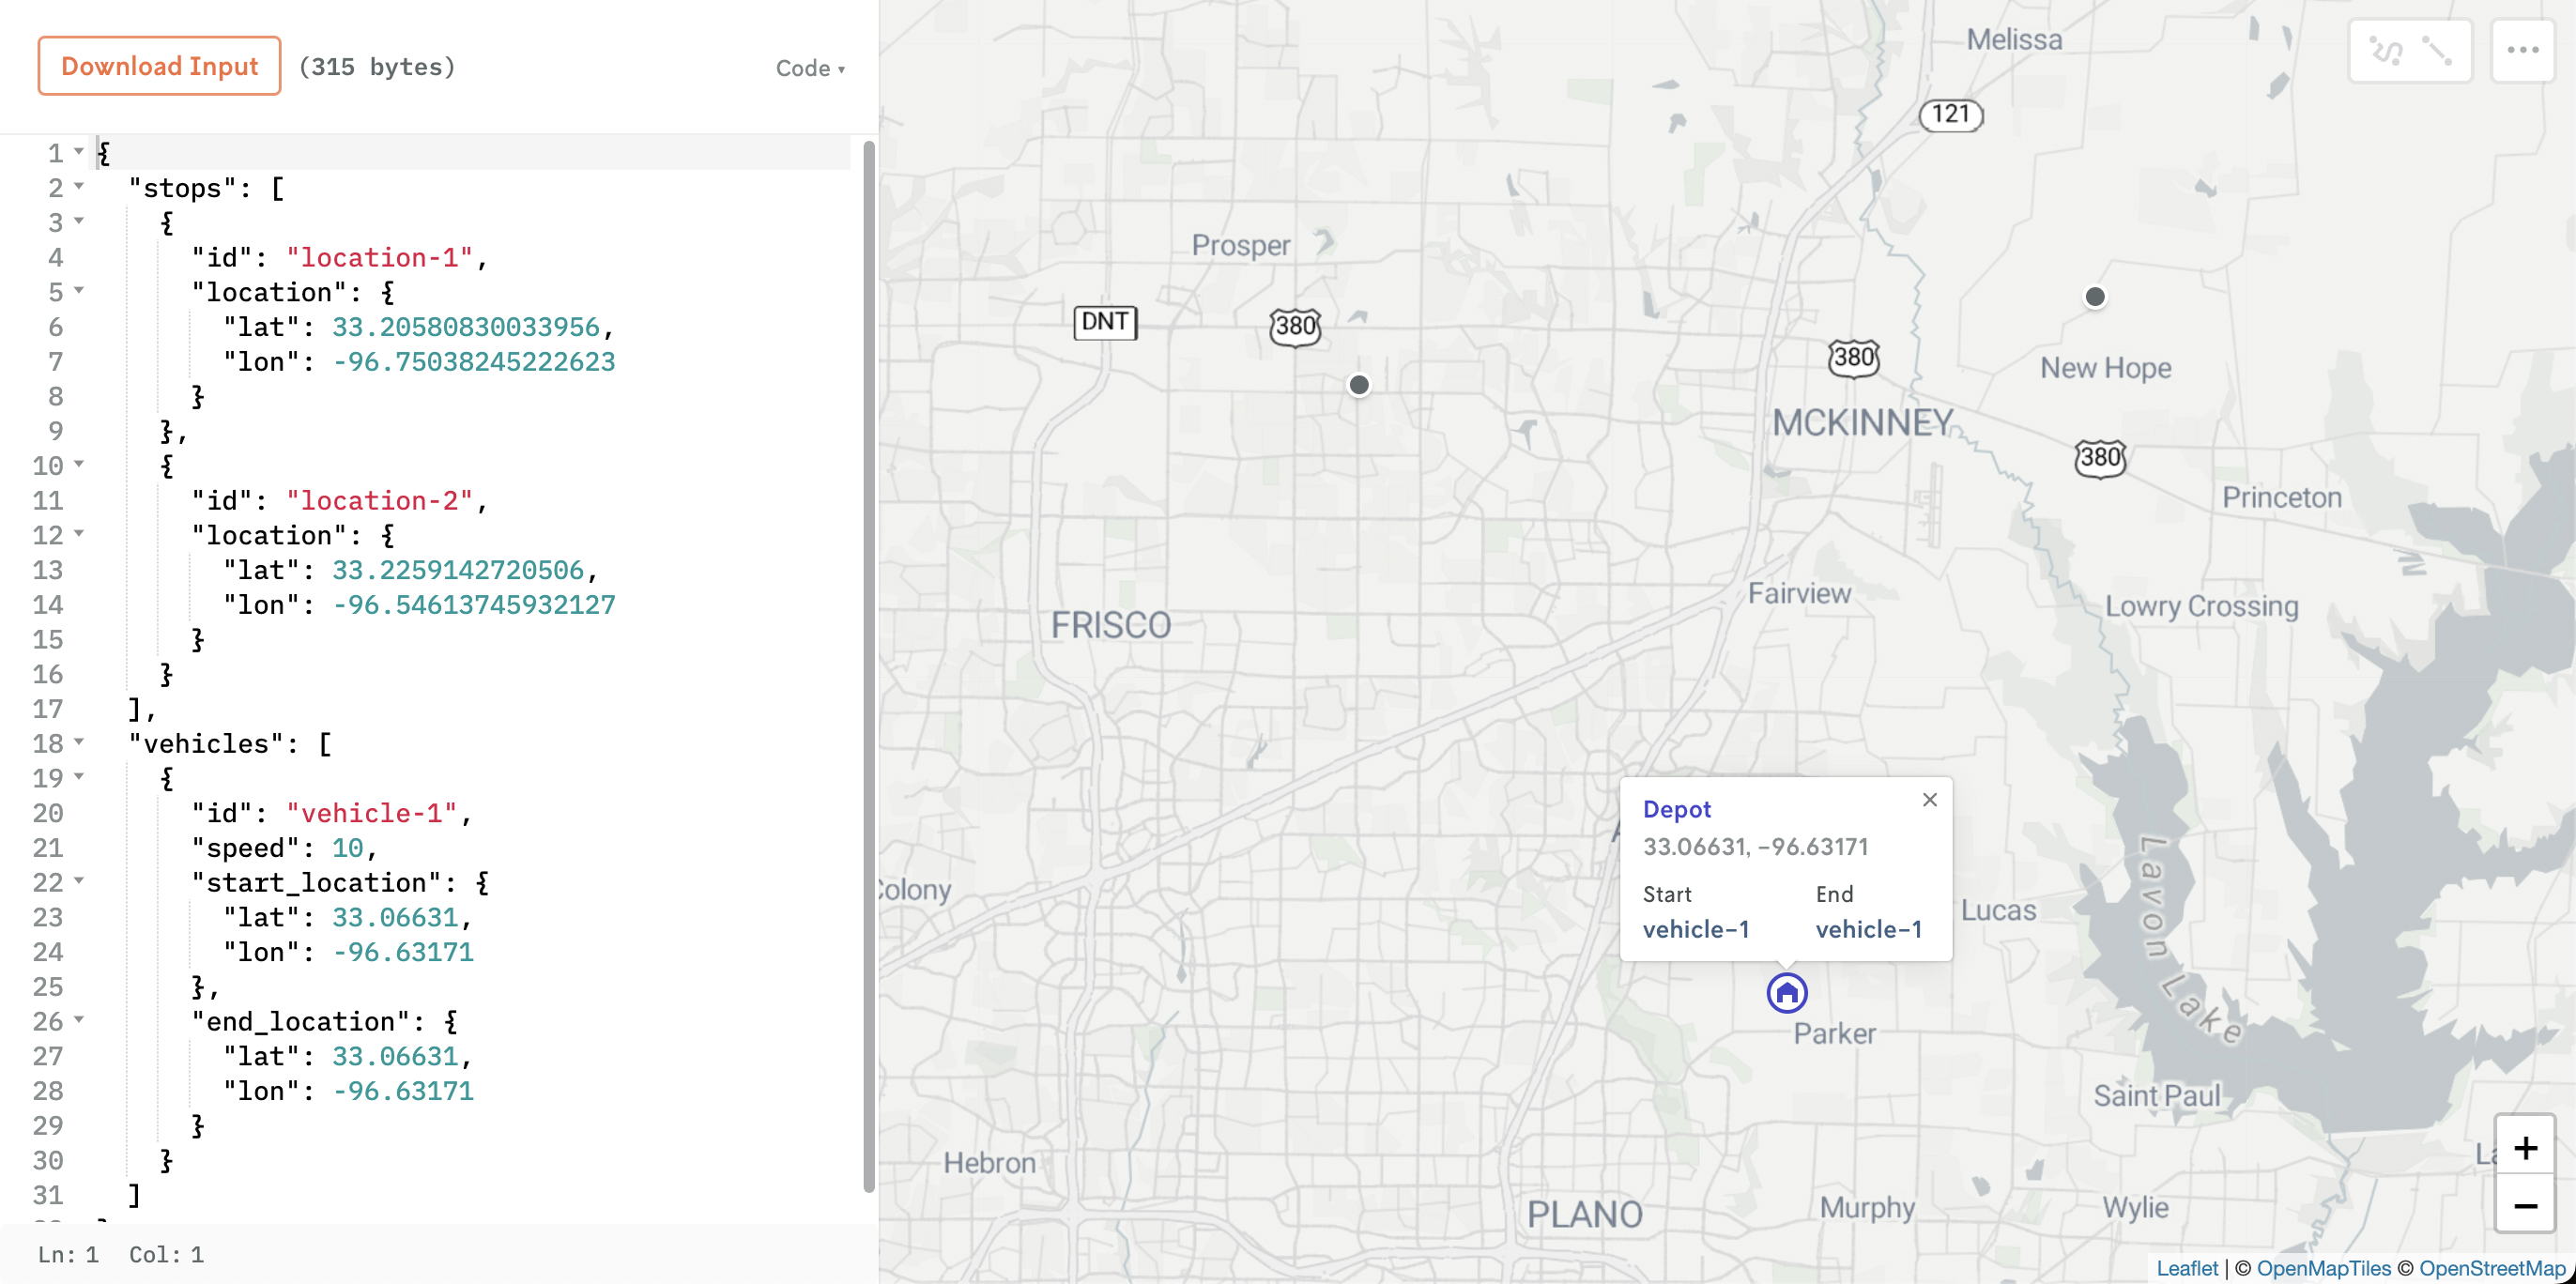
If the start_location and the end_location defined for the vehicle are the same then a special “depot” icon will appear.

{
  "stops": [
    {
      "id": "location-1",
      "location": {
        "lat": 33.20580830033956,
        "lon": -96.75038245222623
      }
    },
    {
      "id": "location-2",
      "location": {
        "lat": 33.2259142720506,
        "lon": -96.54613745932127
      }
    }
  ],
  "vehicles": [
    {
      "id": "vehicle-1",
      "speed": 10,
      "start_location": {
        "lat": 33.06631,
        "lon": -96.63171
      },
      "end_location": {
        "lat": 33.06631,
        "lon": -96.63171
      }
    }
  ]
}
Copy

Screenshot showing the two locations and a special depot icon showing the location of the vehicle start and end location.

The start and end locations for the vehicles can also be added as defaults. See the full input schema reference for more.
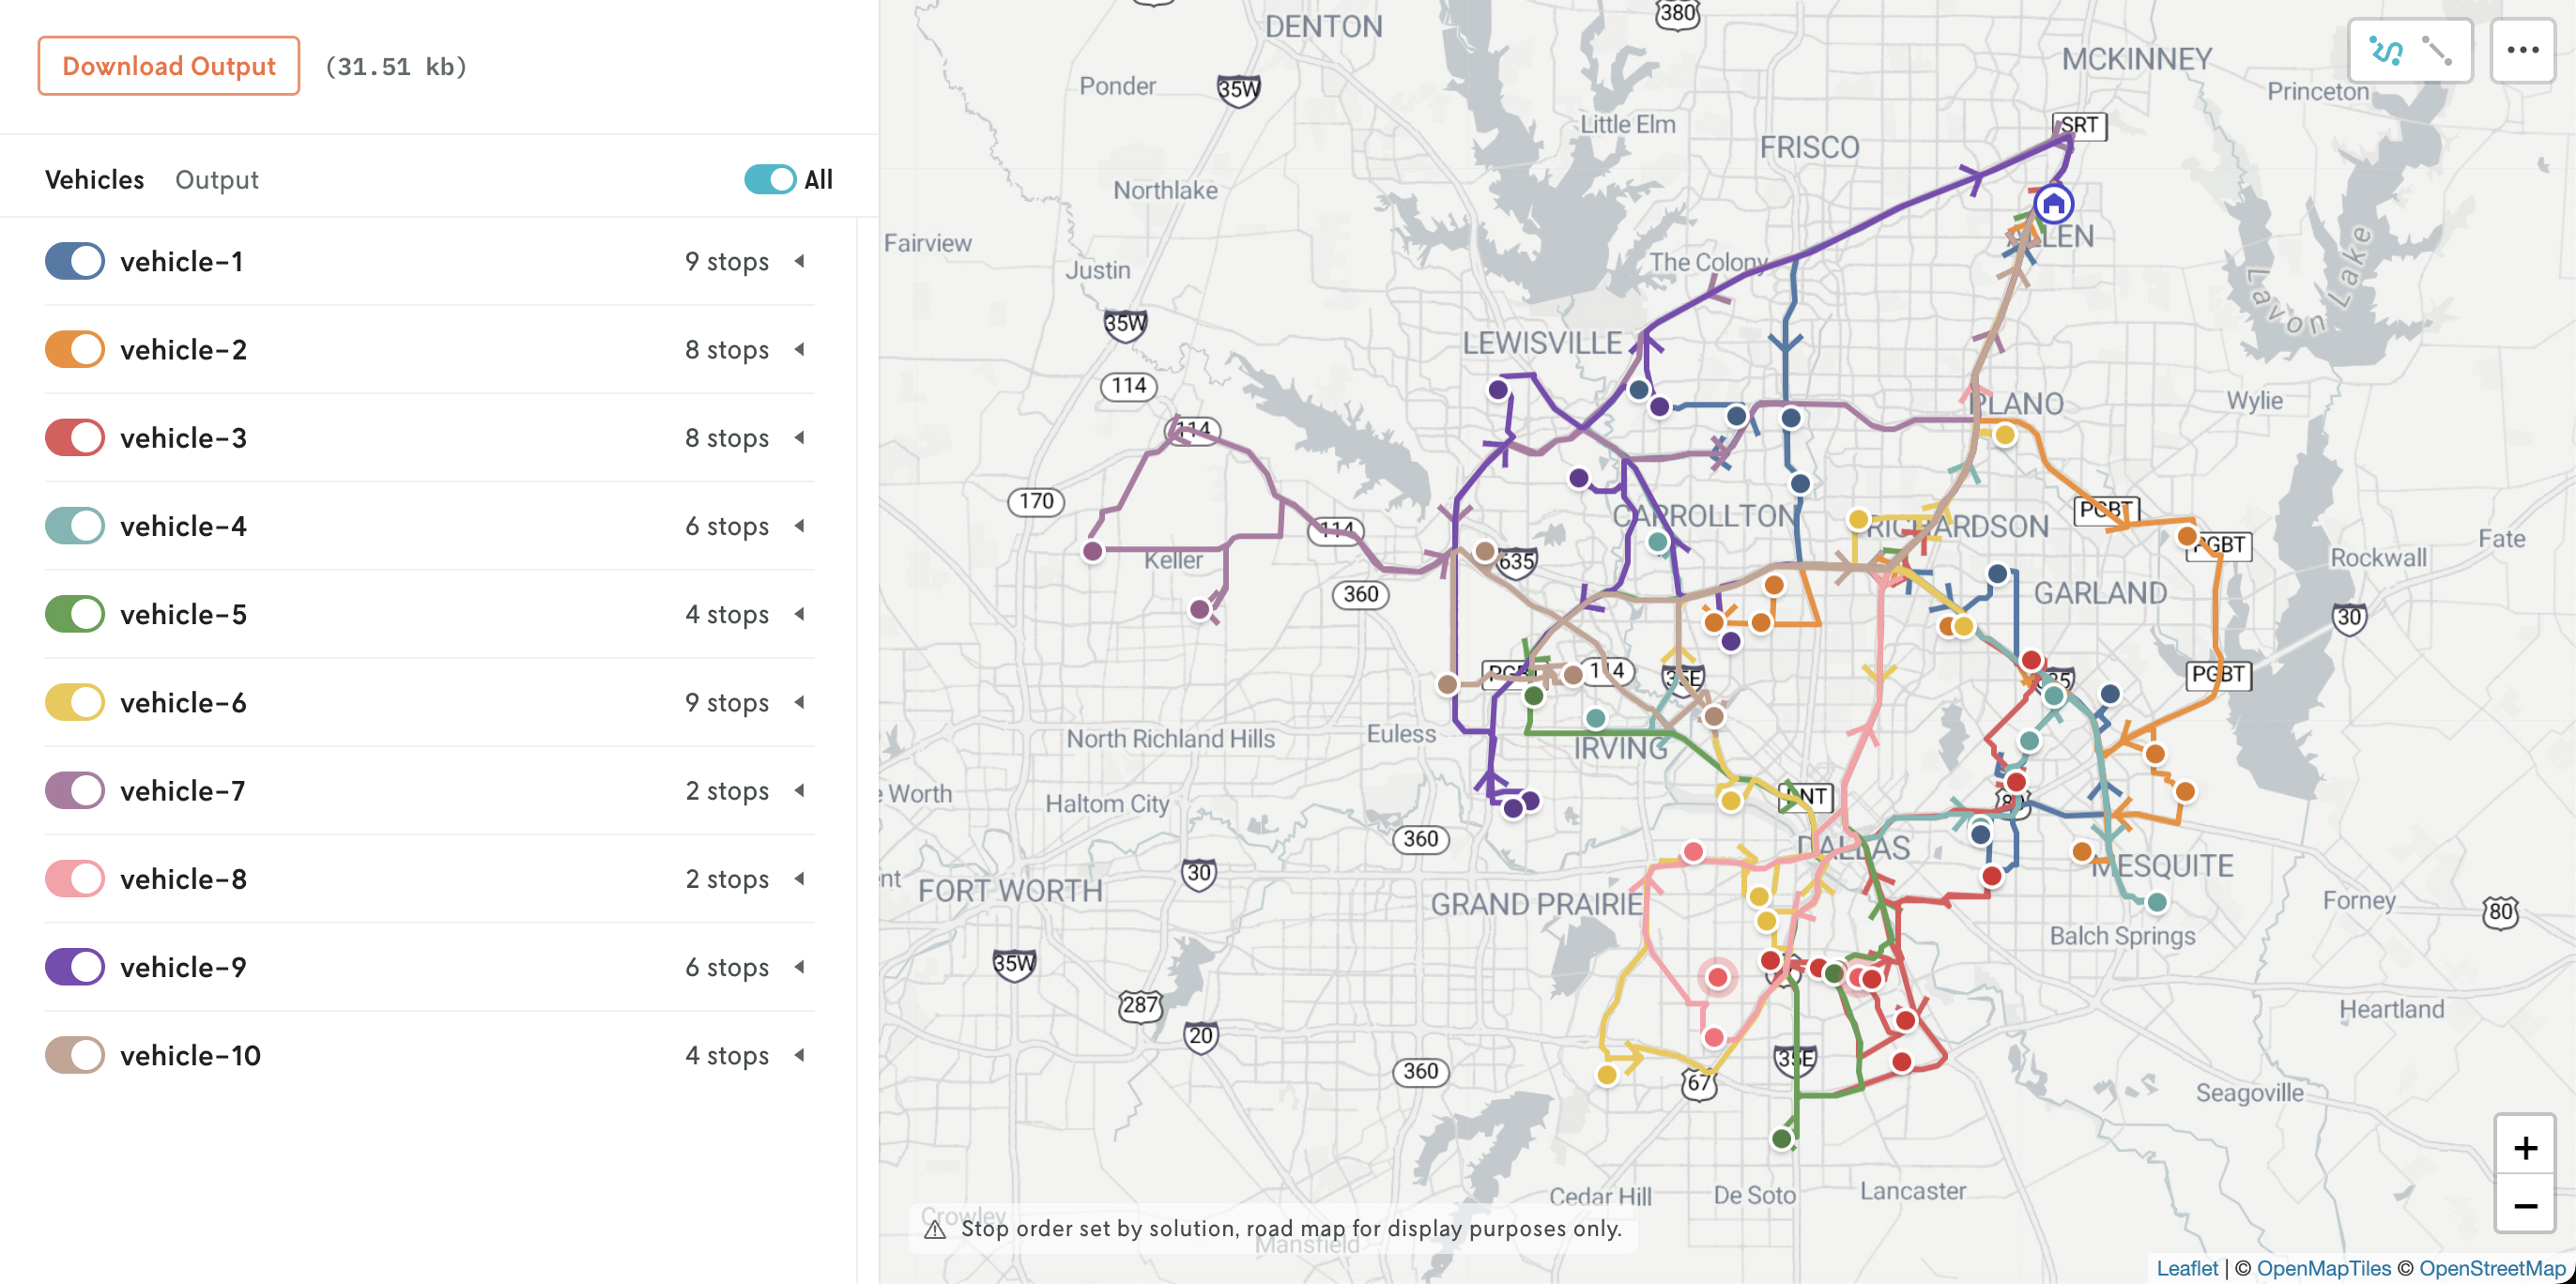
Output

To activate the routing-based visualization for the run result, your output JSON file must have a top-level solutions array that contains an object with two properties: unplanned and vehicles.

{
  "solutions": [
    {
      "unplanned": [],
      "vehicles": []
    }
  ]
}
Copy

The unplanned array holds stops that were not assigned to vehicles. Each unplanned stop in the unplanned array must have at a minimum a location object and id:

{
  "id": "location-1",
  "location": {
    "lon": -96.86074,
    "lat": 32.67741
  }
}
Copy

The vehicles array holds an array of vehicle objects which must have the following minimum schema:

{
  "id": "vehicle-1",
  "route": [
    {
      "stop": {
        "id": "location-1",
        "location": {
          "lon": -96.54613745932127,
          "lat": 33.2259142720506
        }
      }
    }
  ]
}
Copy

Where each object in the route array represents a vehicle stop along the route, the order of objects in the array following the sequential order of stops in the vehicle’s route.

So a minimum schema of the following (note that the stop’s quantity and vehicle’s capacity are only present to force an unplanned stop):

{
  "stops": [
    {
      "id": "location-1",
      "location": {
        "lat": 33.20580830033956,
        "lon": -96.75038245222623
      }
    },
    {
      "id": "location-2",
      "location": {
        "lat": 33.2259142720506,
        "lon": -96.54613745932127
      }
    },
    {
      "id": "location-3",
      "location": {
        "lat": 33.2659142720506,
        "lon": -96.63613745932128
      },
      "quantity": -100
    }
  ],
  "vehicles": [
    {
      "id": "vehicle-1",
      "speed": 10,
      "capacity": 1
    }
  ]
}
Copy

Produces this visualization:

One unplanned stop marked with a red dot and two planned stops color coded to the vehicle’s route color are shown with a thick line displaying the vehicle route between the two planned stops.

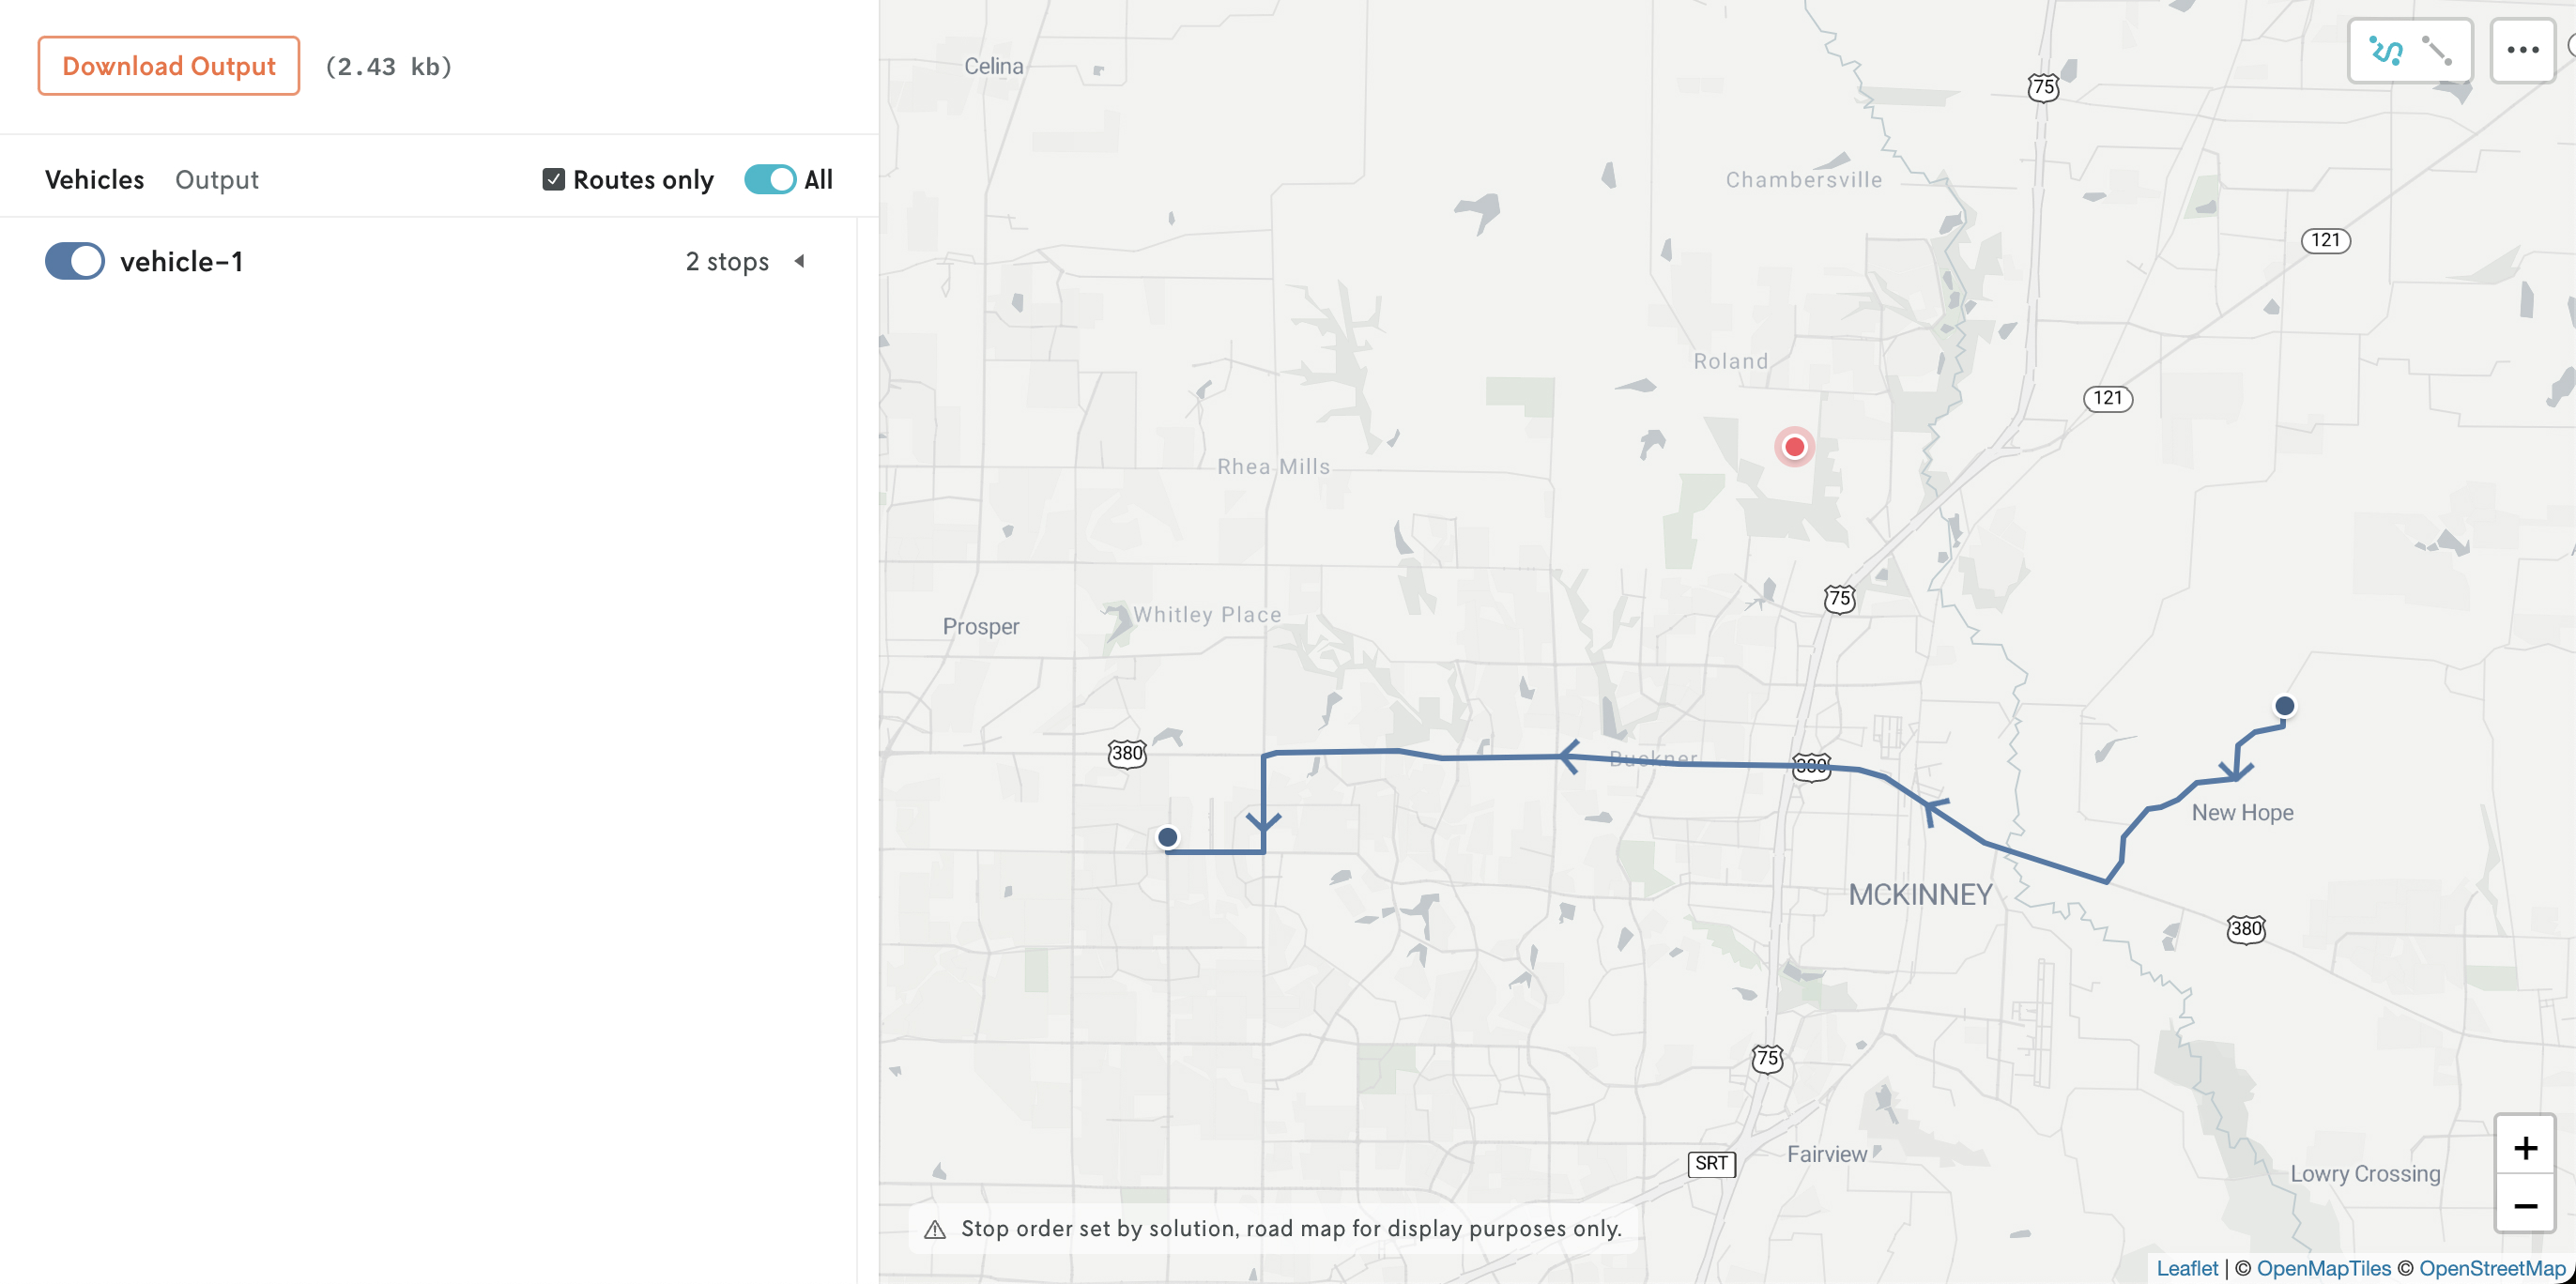
Duration and distance display

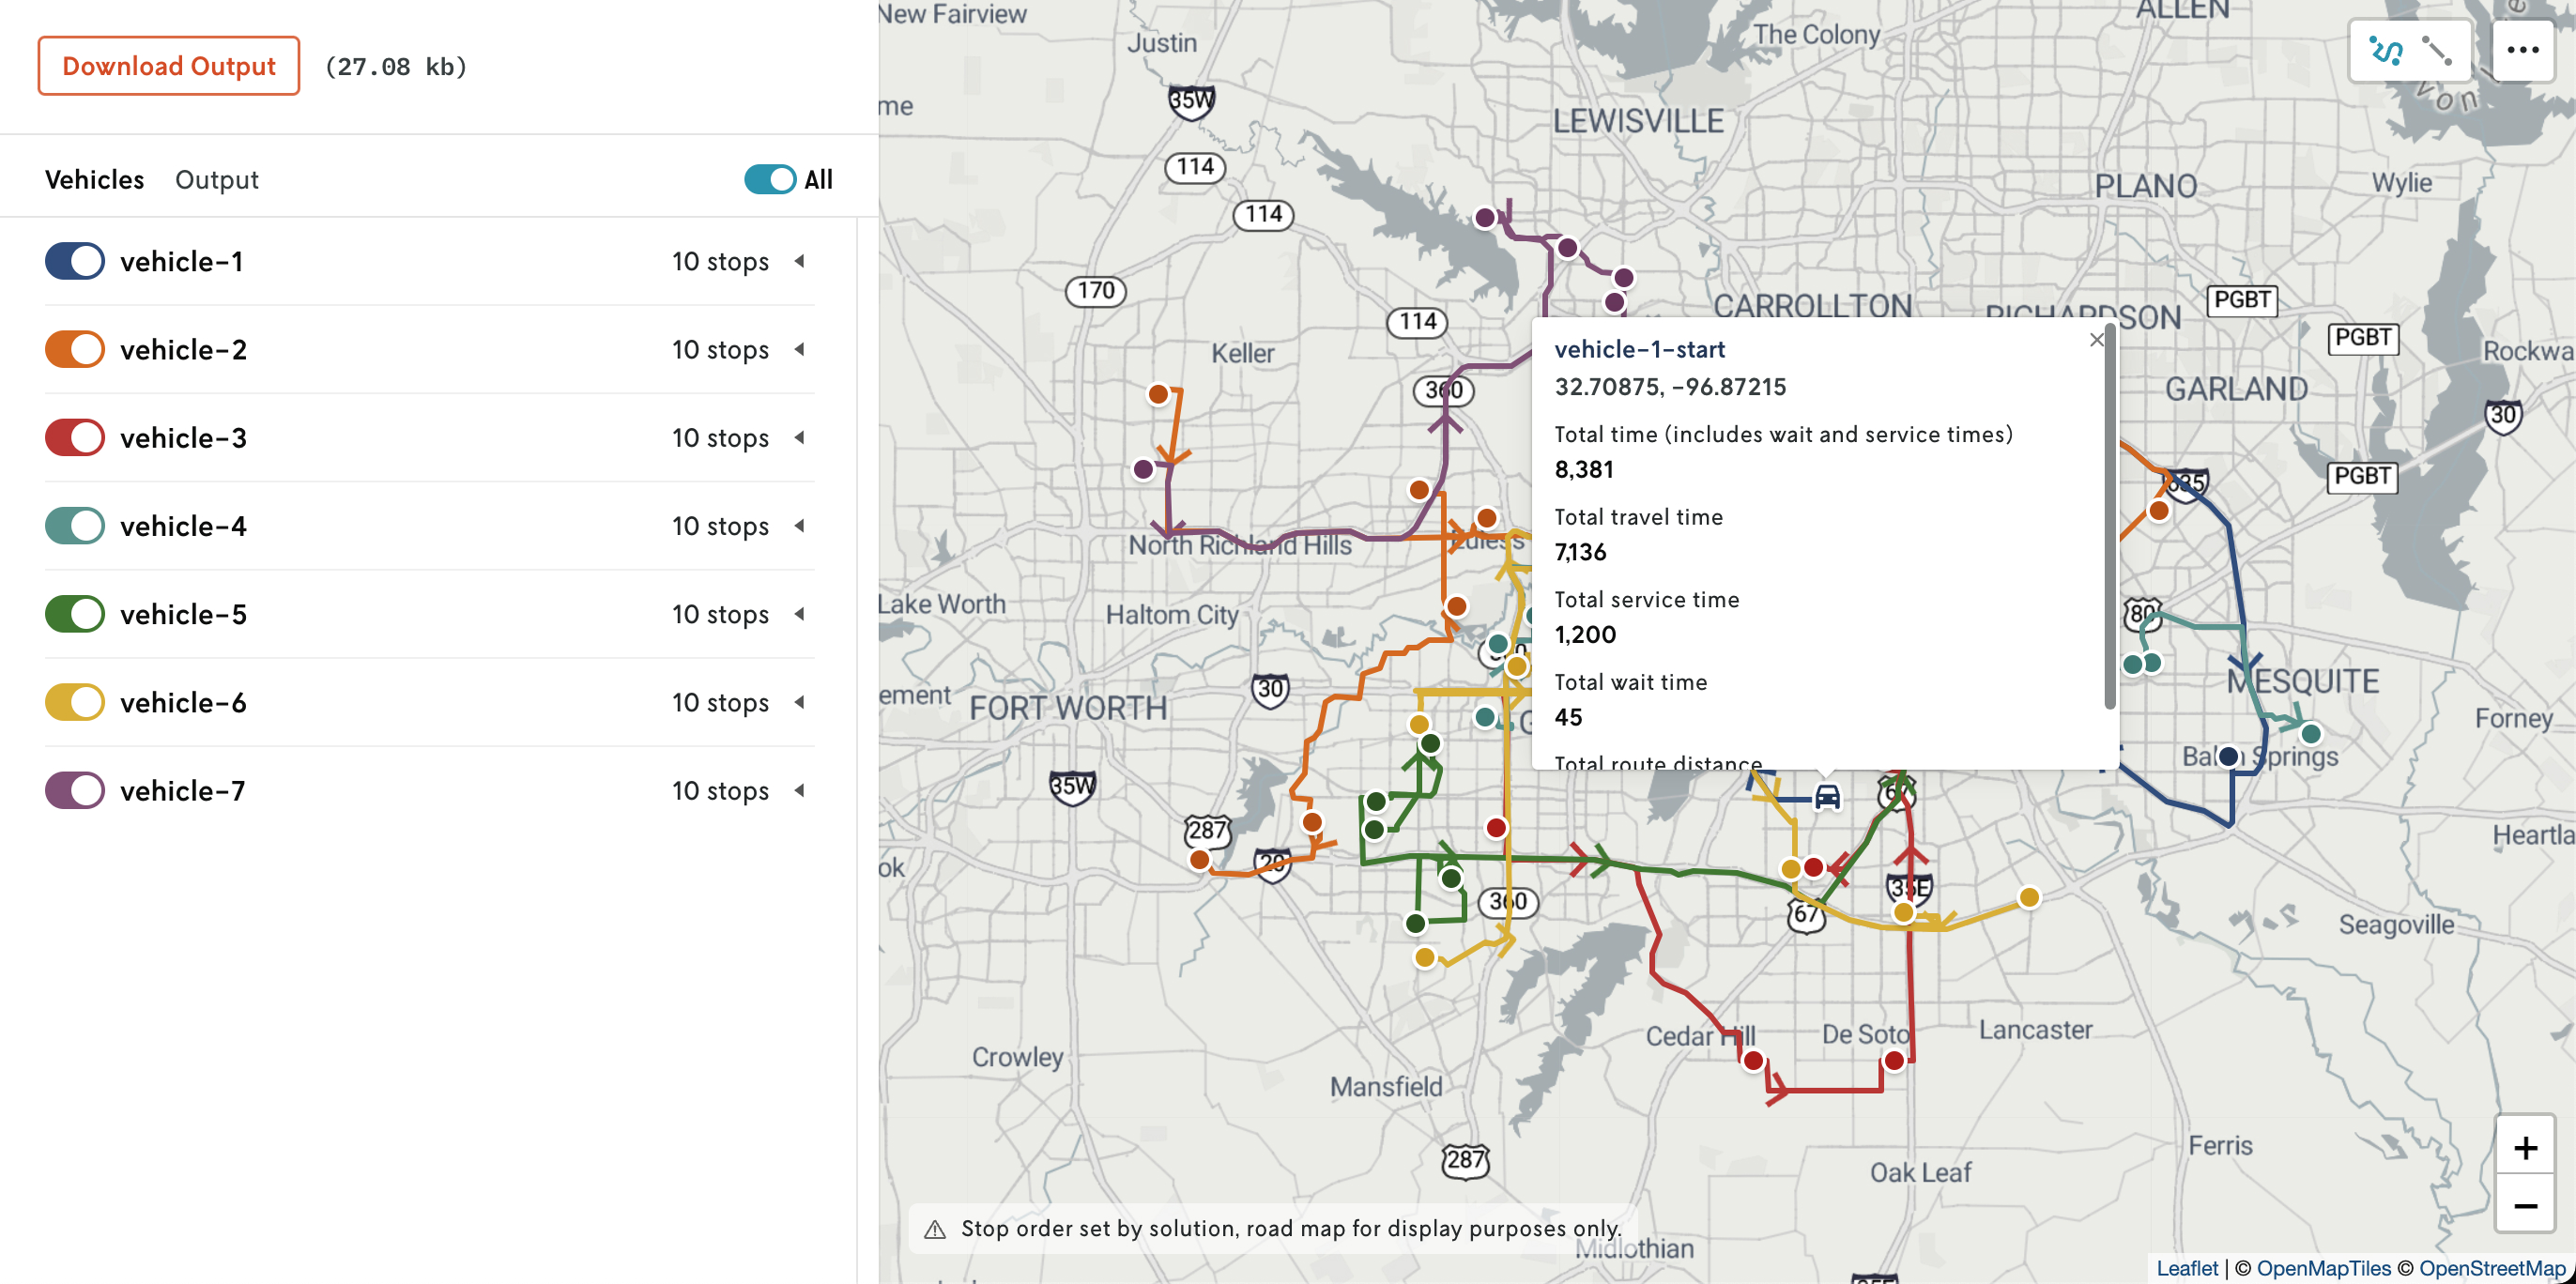
In addition to the location, there are 5 other properties that can be defined on the vehicle object that are picked up by the visualization and listed in the vehicle’s tooltip content:

{
  "id": "vehicle-1",
  "route": [...],
  "route_duration": 3949,
  "route_stops_duration": 1680,
  "route_travel_distance": 27237,
  "route_travel_duration": 2269,
  "route_waiting_duration": 1304,
}
Copy

Routing visualization showing a vehicle’s tooltip content that displays the extra information.

Likewise, additional travel and distance properties can be defined for each stop in the vehicle’s route array and if present will be displayed in the stop’s tooltip content:

{
  "stop": {
    "id": "location-1",
    "location": {
      "lon": -96.82794,
      "lat": 32.74745
    }
  },
  "arrival_time": "2021-06-10T10:47:57Z",
  "cumulative_travel_distance": 2126,
  "cumulative_travel_duration": 177,
  "duration": 300,
  "end_time": "2021-06-10T10:52:57Z",
  "start_time": "2021-06-10T10:47:57Z",
  "travel_duration": 177,
  "travel_distance": 2126,
}
Copy

Routing visualization showing a stop’s tooltip content that displays the extra information.

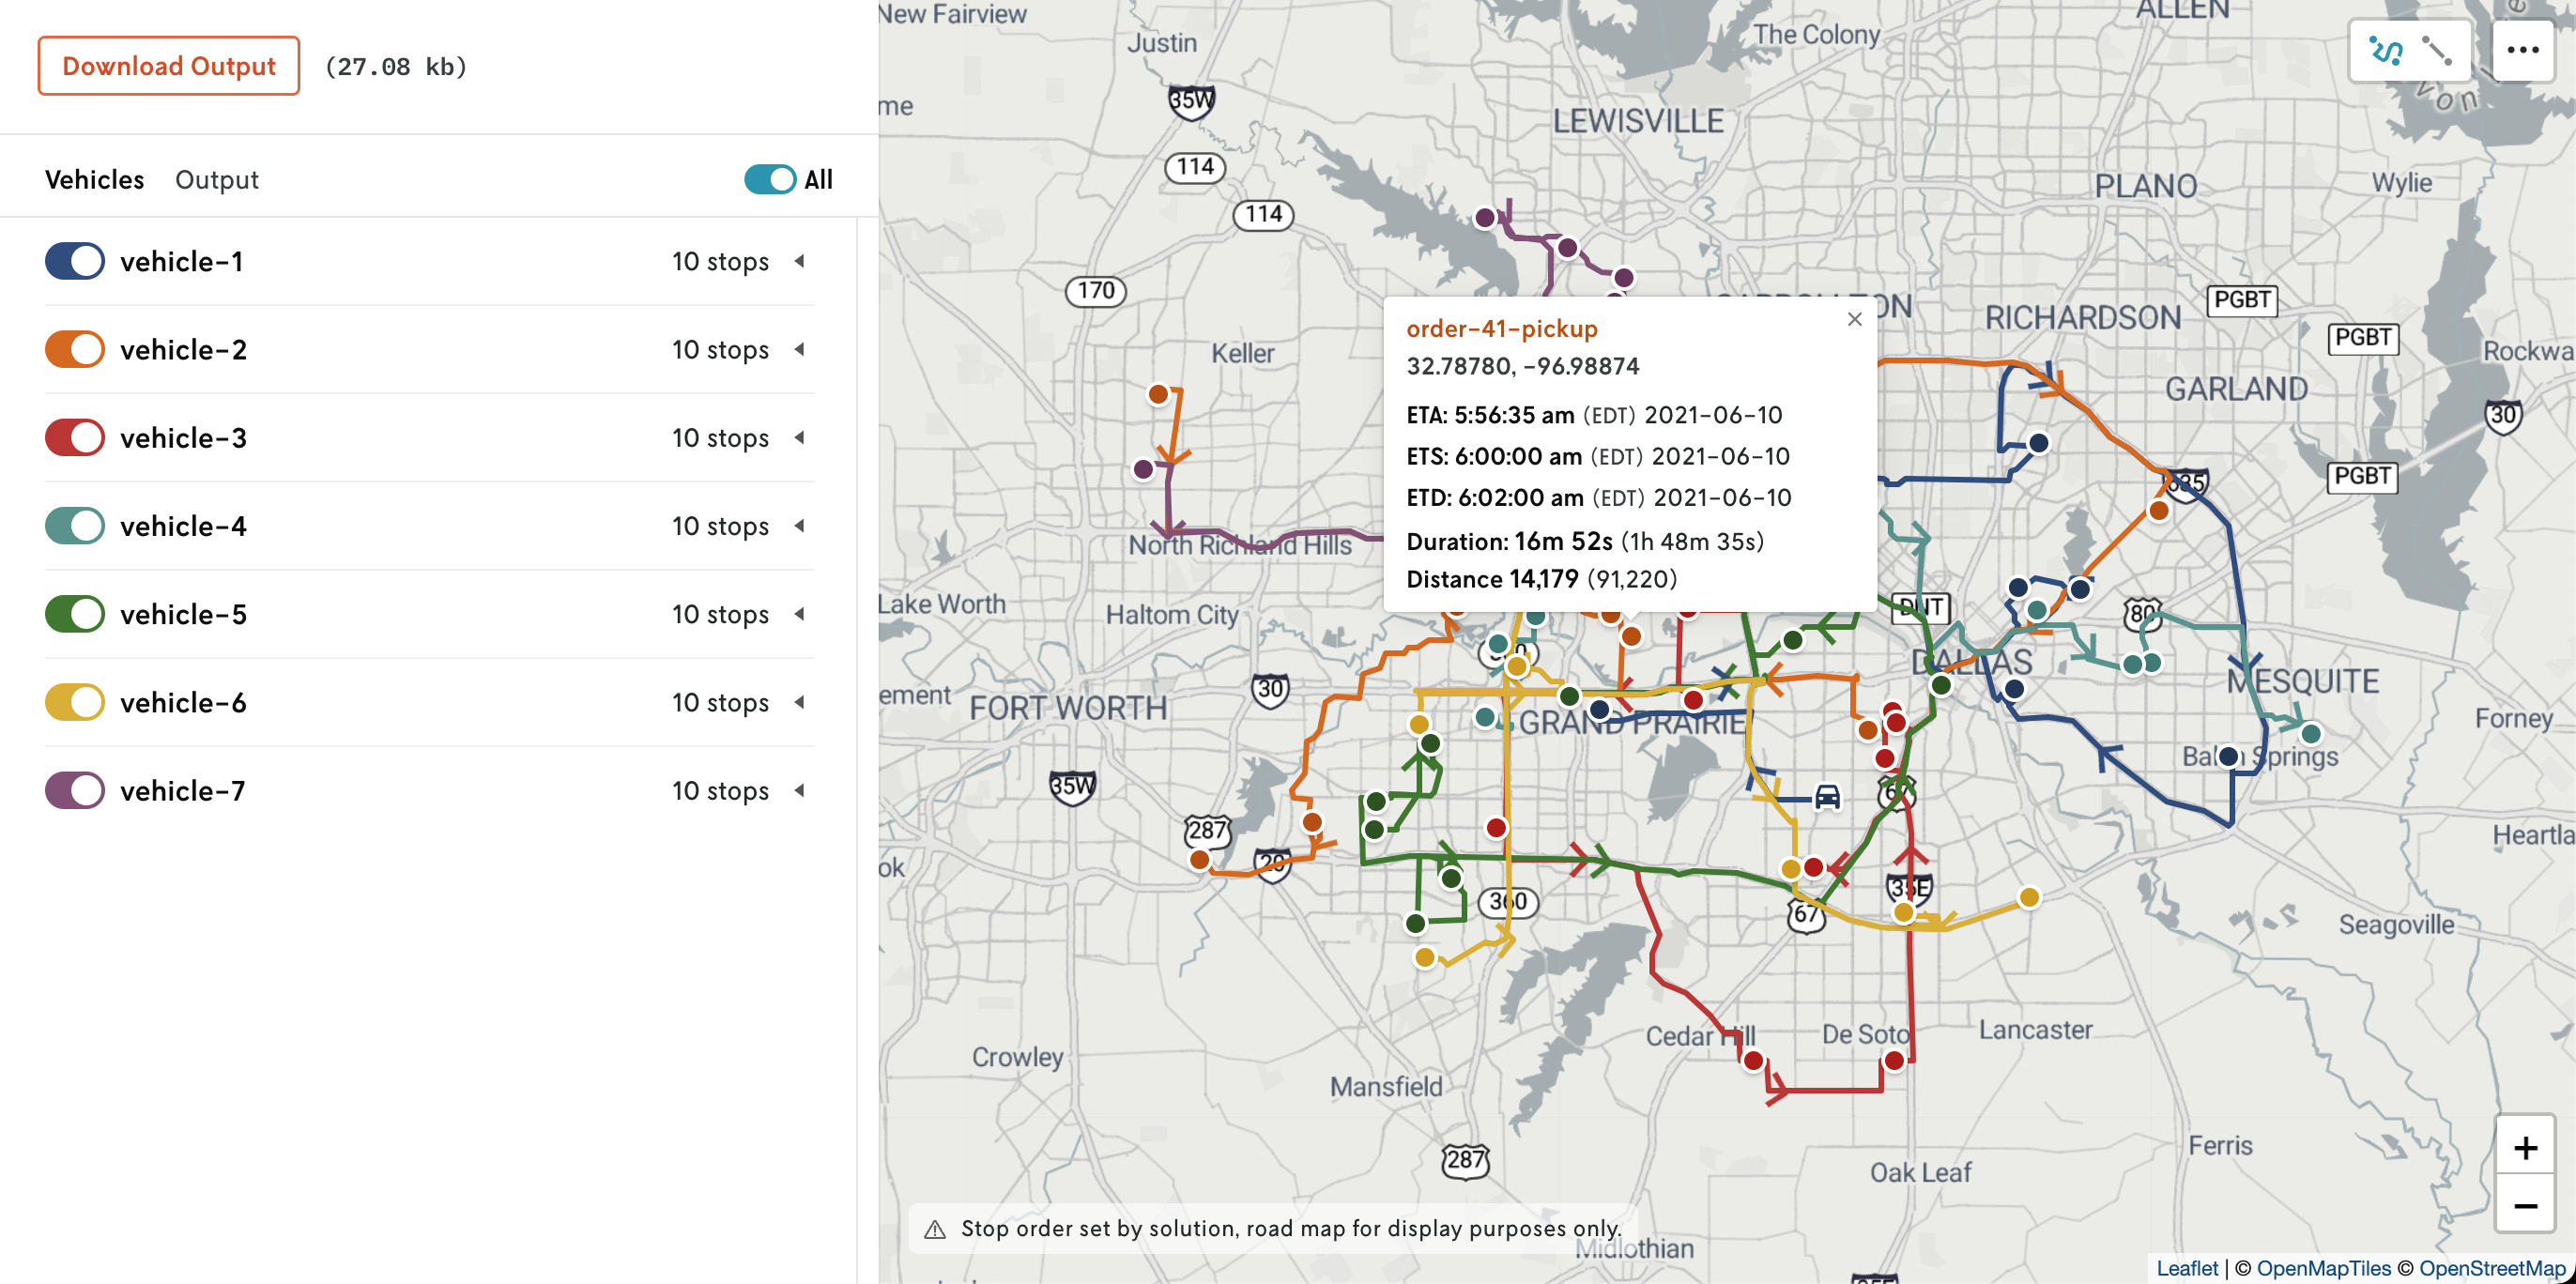
Other values can be added, but the attributes defined above are the only items that will be shown as part of the routing visualization. However, note that the full contents of the run output is always available in the Output tab of the Result view.

See the full ouput schema reference for more detailed definitions of these additional properties and the rest of the nextroute output schema.

Page last updated

Go to on-page nav menu